Tron (TRX) price forecast for 2025–2030 with insights on token utility, growth drivers, market trends, and long-term investment ou...
How to Buy XRP: A Step-by-Step Guide for 2025
Last Updatedby Tony Frank · 11 mins read
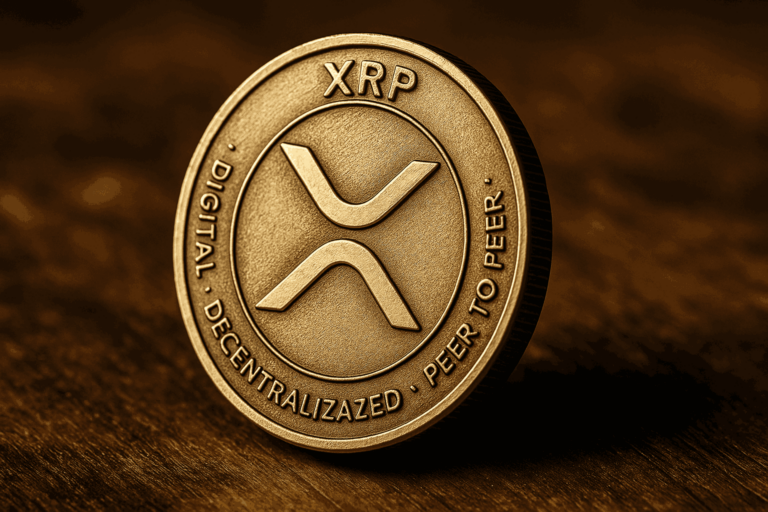
Step-by-step guide to buying, storing, and managing XRP in 2025, with essential tips on exchanges, payments, and legal factors.
Key Notes:
- XRP is designed for fast, low-cost cross-border payments, offering real-world utility beyond speculation.
- Buying XRP in 2025 requires choosing a compliant exchange, verifying your identity, and selecting a secure payment method.
- Secure storage and ongoing market monitoring are essential for managing your XRP investment effectively.
As interest in digital assets grows in 2025, XRP stands out as one of the most actively discussed and institutionally relevant cryptocurrencies. Known for its speed, scalability, and real-world utility in cross-border payments, XRP offers investors more than just speculative potential. Whether you’re new to crypto or looking to diversify your portfolio, understanding how to buy and manage XRP effectively is essential.
This guide walks you through every process step — from choosing the right exchange and payment method to securing your assets and navigating the evolving legal landscape.
Understanding XRP and Its Significance
XRP is a digital asset native to the XRP Ledger, an open-source blockchain designed to enable fast and cost-efficient transactions. Created by Ripple Labs, XRP plays a central role in the company’s mission to modernize cross-border payments — a sector traditionally dominated by slow, expensive, and outdated systems like SWIFT.
Ripple Logo. Photo: Ripple Official Website.
Unlike many other cryptocurrencies that function primarily as speculative assets, XRP was purpose-built for utility within financial infrastructure. Its main use case lies in acting as a bridge currency, allowing institutions to settle international transactions in seconds and with minimal fees. This approach reduces liquidity costs for banks and payment providers, improving transparency and settlement speed across borders.
XRP Logo. Photo: XRP Ledger Official Website.
XRP’s position in the broader crypto market remains unique. Despite regulatory challenges, particularly the long-running legal battle with the U.S. Securities and Exchange Commission (SEC), XRP has maintained its relevance and large user base. It consistently ranks among the top cryptocurrencies by market capitalization and has seen adoption by several major financial institutions exploring blockchain-based remittance solutions.
With growing interest in real-world crypto applications and the ongoing push toward faster, cheaper global payments, XRP stands out as one of the few digital assets with a clearly defined purpose in the evolving financial landscape.
Setting Up Your Cryptocurrency Exchange Account
Before buying or trading any digital assets, the first step is to choose a reputable cryptocurrency exchange. Platforms like Coinbase, Kraken, and Uphold have established themselves as trusted gateways into the crypto market, offering user-friendly interfaces, regulatory compliance, and strong security features.
When selecting an exchange, consider factors such as supported assets, trading fees, regional availability, and security track record. For example, Coinbase is known for its ease of use and regulatory standing in the U.S.; Kraken is favored by more experienced traders for its advanced tools and lower fees. At the same time, Uphold supports a broader range of assets, including fiat currencies, cryptocurrencies, and precious metals.
Once you’ve chosen a platform, the registration process is typically straightforward. You must provide a valid email address, create a strong password, and confirm your email. From there, most exchanges require you to complete a Know Your Customer (KYC) verification. This involves submitting a government-issued ID, a selfie, and sometimes proof of address to comply with anti-money laundering (AML) regulations.
After verifying your identity — a process that can take a few minutes to a couple of days, depending on the platform — you can link a payment method such as a bank account or debit card to fund your account. With these steps completed, you can begin securely exploring, buying, or trading digital assets.
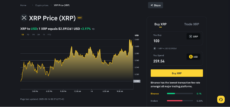
XRP/USD trading pair on Binance. Photo: Binance.
Choosing a Payment Method for Buying Crypto Assets
When purchasing XRP through a cryptocurrency exchange, users can choose from various payment methods depending on their region, preferred platform, and desired transaction speed. The most common options are bank transfers, debit cards, and digital wallets such as Google Pay or Apple Pay.
Bank transfers are often the most cost-effective method, especially for larger purchases. While they may take one to three business days to process, they usually have lower fees than instant payment options. This method is widely supported on platforms like Kraken and Coinbase.
Debit cards provide a faster alternative, allowing users to instantly buy XRP. However, convenience comes at a cost — transaction fees tend to be higher, and some banks may impose restrictions on crypto-related purchases. Still, this remains a popular choice for users looking to start quickly.
Many exchanges now support digital wallets such as Google Pay and Apple Pay for even greater flexibility. These methods offer seamless integration and fast processing, especially on mobile devices, making them ideal for users who prioritize speed and simplicity.
Before selecting a payment method, it is essential to review the exchange’s fee structure, supported currencies, and any geographic limitations. Ensuring your preferred method is both available and secure will make your XRP buying experience smoother and more efficient.
Executing the Purchase of XRP, Market Cap
Once your exchange account is set up and funded, you can execute your first XRP purchase. Most platforms offer two basic order types: market orders and limit orders. A market order buys XRP at the best available price in real time, offering speed and simplicity — ideal for beginners or those who want immediate execution. In contrast, a limit order allows you to set the exact price you’re willing to buy; the order will only be filled if the market reaches that price.
Before placing an order, it’s important to consider XRP’s current price, market capitalization, and liquidity. XRP typically ranks among the most traded cryptocurrencies, benefiting from deep liquidity, ensuring your orders are filled quickly with minimal slippage. You can monitor real-time price data and trading volume directly on the exchange or through reliable data aggregators like CoinMarketCap or CoinGecko.
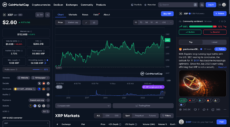
XRP Data. Photo: CoinMarketCap.
When executing your purchase, input the amount of XRP you wish to buy or the amount of fiat currency you’re willing to spend. Double-check transaction fees, which can vary depending on the exchange and payment method. Once confirmed, the XRP will be credited to your exchange wallet, where you can hold it or transfer it to a secure external wallet for long-term storage.
Currently, XRP trades at a market price of XRP $2.45 24h volatility: 2.9% Market cap: $144.40 B Vol. 24h: $4.17 B . At the time of writing, XRP’s market capitalization is $142.2 billion.

XRP Price Chart. Photo: TradingView.
Storing Your XRP Securely
One of the most critical steps after purchasing XRP is ensuring it’s stored securely. While keeping funds on an exchange may be convenient for active trading, it exposes your assets to potential risks such as hacks, platform outages, or regulatory freezes. Transferring XRP to a private wallet is a far safer option for long-term holders.
There are two main types of crypto wallets: hardware wallets and software wallets.
Hardware wallets — such as Ledger Nano X or Trezor Model T — are physical devices that store your private keys offline, making them virtually immune to online threats. They are widely regarded as the most secure option, especially for users holding significant amounts of crypto.
On the other hand, software wallets are applications installed on your desktop or mobile device. Examples include Xumm (a wallet built specifically for the XRP Ledger) and Trust Wallet. While more convenient for frequent access and transactions, software wallets are connected to the internet, which makes them slightly more vulnerable to malware or phishing attempts.
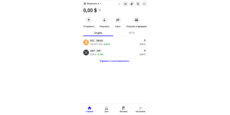
Trust Wallet Interface. Photo. Trust Wallet.
Regardless of which type you choose, always follow best practices: back up your recovery phrase, enable two-factor authentication, and never share your private keys. Proper storage is essential for safeguarding your XRP and maintaining control over your assets in the evolving and often unpredictable crypto landscape.
Monitoring and Managing Your XRP Investment
Once you’ve acquired and securely stored XRP, actively monitoring your investment is key to making informed decisions. Cryptocurrency markets are known for their volatility, and staying updated on price movements, market trends, and broader industry developments can help you manage risk and seize opportunities.
Start by using reliable tools such as CoinMarketCap, CoinGecko, or your exchange’s native dashboard to track XRP’s real-time price, market capitalization, trading volume, and historical performance. Many platforms also allow you to set price alerts, helping you react quickly to major price swings.
Beyond raw numbers, understanding market sentiment and macro trends is essential. Follow news from trusted crypto media outlets, monitor regulatory updates, and watch Ripple’s corporate developments, as they can significantly influence XRP’s price. For example, legal outcomes involving Ripple or new partnerships with financial institutions often create sharp market reactions.
Consider short-term technical indicators and long-term fundamentals when deciding whether to hold or sell your XRP. Some investors hold through market cycles, betting on XRP’s utility in cross-border payments. Others may prefer to sell during price spikes to realize gains or rebalance their portfolios. Whatever strategy you choose should align with your risk tolerance, investment goals, and understanding of the crypto market’s unique dynamics.
Legal and Regulatory Considerations
XRP occupies a unique and often contested position within the cryptocurrency regulatory landscape. Its legal status has been intensely scrutinized, particularly in the United States, where the U.S. Securities and Exchange Commission (SEC) filed a high-profile lawsuit against Ripple Labs in December 2020. The SEC alleged that XRP was sold as an unregistered security, a claim that sent shockwaves through the market and impacted XRP’s availability on major exchanges.
In a significant development, a U.S. federal judge ruled in July 2023 that XRP is not a security when sold to the general public on secondary markets. However, certain institutional sales may still fall under securities laws. This partial legal clarity has allowed several major exchanges, including Coinbase and Kraken, to relist XRP for trading in the U.S., restoring investor access and boosting market confidence.
In August 2024, a U.S. court significantly reduced the penalty imposed on Ripple Labs in its long-running legal battle with the SEC. Originally seeking $2 billion in fines, the SEC ultimately settled for a $125 million civil penalty after the court rejected most of the regulator’s claims, including those related to institutional XRP sales. This marked a turning point in the case, signaling a shift toward a more measured approach in crypto enforcement.
However, the case took a decisive turn in March 2025, when the SEC, under its new chairman, Paul Atkins, who succeeded Gary Gensler, dropped all remaining claims against Ripple and officially closed its investigation.
Outside the U.S., XRP’s regulatory treatment varies. Countries like Japan and the UK have taken a more open stance, recognizing XRP as a digital asset or utility token. However, global users should know that local laws may affect how XRP can be purchased, used, or taxed.
Given the evolving regulatory environment, investors must stay informed about legal developments related to XRP. Always ensure that the exchange you use complies with local regulations, and consult a financial advisor or legal professional if you’re uncertain about the rules in your jurisdiction.
Conclusion: Navigating Your XRP Investment Journey
Investing in XRP involves more than buying a digital asset — it’s a step-by-step process that requires careful planning, informed decision-making, and ongoing attention to market dynamics. From choosing a reputable exchange and completing identity verification, to selecting a payment method, executing your first trade, and securing your holdings in a private wallet, each stage plays a vital role in protecting your investment and positioning yourself for long-term success.
But purchasing XRP is only the beginning. The cryptocurrency market is fast-moving and often unpredictable, making continuous research and active risk management essential. Track XRP’s price movements, monitor developments in global regulation — particularly Ripple’s evolving legal standing — and stay alert to broader trends in blockchain adoption and cross-border finance.
Whether holding XRP as a long-term believer in its utility or trading it as part of a diversified portfolio, remember that knowledge and caution are your best tools. By staying informed and managing your exposure wisely, you can navigate the ups and downs of the market and make the most of your XRP investment journey.
Disclaimer: This article is for informational purposes only and does not provide financial, trading, or investment advice. Cryptocurrency prices can fluctuate wildly, so always do your own research (DYOR), assess risks, and consult a professional before making financial decisions. The author and team are not responsible for any losses from using this information.
FAQ
What is XRP, and how does it function in the crypto ecosystem?
XRP is a digital asset used for fast, low-cost cross-border payments. It operates on the XRP Ledger, a decentralized blockchain optimized for financial transactions.
Which exchanges are best for buying XRP in 2025?
Coinbase, Kraken, Binance, and Uphold are the leading platforms for buying XRP in 2025. They all offer strong liquidity and comply with regulatory standards.
Can I purchase XRP using a credit or debit card with a bank account?
Yes, most major exchanges allow XRP purchases via credit or debit cards, though fees may be higher than bank transfers.
What are the fees associated with buying XRP?
Fees vary by platform and payment method, typically from 0.5% to 4% depending on transaction size and funding source.
How do I store XRP securely after purchase?
The safest way to store XRP is to transfer it to a private wallet—preferably a hardware wallet like Ledger or a reputable software wallet such as Xumm.
Is it possible to buy XRP with fiat currencies like USD or EUR?
Yes, XRP can be purchased directly with fiat currencies like USD, EUR, and others on most major exchanges.
What is the minimum amount of XRP I can buy?
The minimum varies by platform, but many exchanges allow purchases of as little as $10 worth of XRP.
Are there any restrictions on buying XRP in certain countries?
Regulatory restrictions may apply in some regions, especially in countries where XRP’s legal classification is scrutinized, such as the United States.
How does XRP's consensus mechanism differ from other cryptocurrencies?
Unlike Bitcoin’s proof-of-work, XRP uses a consensus protocol with trusted validators to confirm transactions quickly and efficiently without mining.
What factors influence XRP's price fluctuations?
XRP’s price is affected by overall crypto market trends, legal developments (especially involving Ripple), adoption by financial institutions, and macroeconomic sentiment.
Can I use XRP for everyday transactions, or is it mainly for investment?
While XRP is primarily used for institutional cross-border transfers and investment, some merchants and platforms accept it for everyday payments.
How do I sell XRP when I decide to cash out?
You can sell XRP directly on an exchange by placing a market or limit sell order, then withdrawing the proceeds to your linked bank account or payment method.
What are the tax implications of buying and selling XRP?
Tax rules vary by country, but selling XRP at a profit may trigger capital gains taxes, and purchases may need to be reported depending on local laws.
This guide explains how to buy TOKEN6900, a new meme coin project with an attractive market capitalization. Learn how to join the ...
Pepe Coin surged in popularity after its 2023 launch. This article covers market trends, price forecasts, technical signals, and h...